Thinking about tinting your car windows? You’re not alone. While some drivers are after that sleek, stylish look, car window tinting offers more than just aesthetics. It protects your privacy, shields you from harmful UV rays, reduces glare, and keeps your car cooler on hot days.
Whether you want to try it yourself or are still deciding between DIY and professional services, this step-by-step guide will walk you through everything you need to know to get started.
Why Tint Your Car Windows?
There’s more to window tinting than just adding a cool factor to your ride. Here are some top benefits:
- UV Protection: High-quality window tints block up to 99% of harmful UV rays, helping protect your skin and preventing interior materials from fading or cracking.
- Temperature Control: Window tinting significantly reduces heat buildup inside your car, especially during the summer months.
- Privacy and Security: Tinted windows make it harder for people to see inside your vehicle, helping protect your belongings and giving you peace of mind.
- Improved Safety: In case of an accident, tint film can help hold shattered glass together, reducing the risk of injuries.
With all these benefits, it’s no wonder car window tinting has become a popular upgrade among vehicle owners.
DIY vs. Professional Window Tinting: Which Should You Choose?
When it comes to car window tinting, you have two main options: hire a professional or do it yourself.
Professional Tinting
- Advantages: High precision, faster installation, and most importantly, a warranty on the work.
- Drawbacks: Can be expensive, especially if you’re using premium films or have a complex vehicle shape.
DIY Tinting
- Advantages: Much cheaper, a fun project for auto enthusiasts, and lets you take your time.
- Drawbacks: Requires patience, attention to detail, and the right tools to avoid common mistakes.
If you’re someone who enjoys learning and working on your own vehicle, DIY tinting could be a rewarding experience. But if you’re short on time or want a flawless finish without the learning curve, professional services may be the better route.
Getting Started: Tools & Preparation
Before diving into the installation, you’ll need a few essential items:
- Tint film (pre-cut or roll)
- Spray bottle filled with baby shampoo and water
- Microfiber cloth
- Razor blade or window scraper
- Utility knife
- Squeegee or credit card
- Heat gun or hair dryer
Work in a clean, dust-free area, ideally a garage. Even a small piece of lint or dust can cause bubbles in the tint.
Start by thoroughly cleaning the inside and outside of your windows with a glass cleaner and a razor blade to remove any debris, grease, or residue. This step is crucial for a smooth application.
Step-by-Step: How to Apply Window Tint Film
1. Measure and Trim the Tint
Spray the outside of the window with the soapy solution. Place the tint film on the outside of the glass (with the liner facing you) and trim it to size, leaving a 1/4 inch margin around the edge.
Use a heat gun to gently shape the film to fit the curve of the window. Be patient during this step—proper sizing makes a big difference.
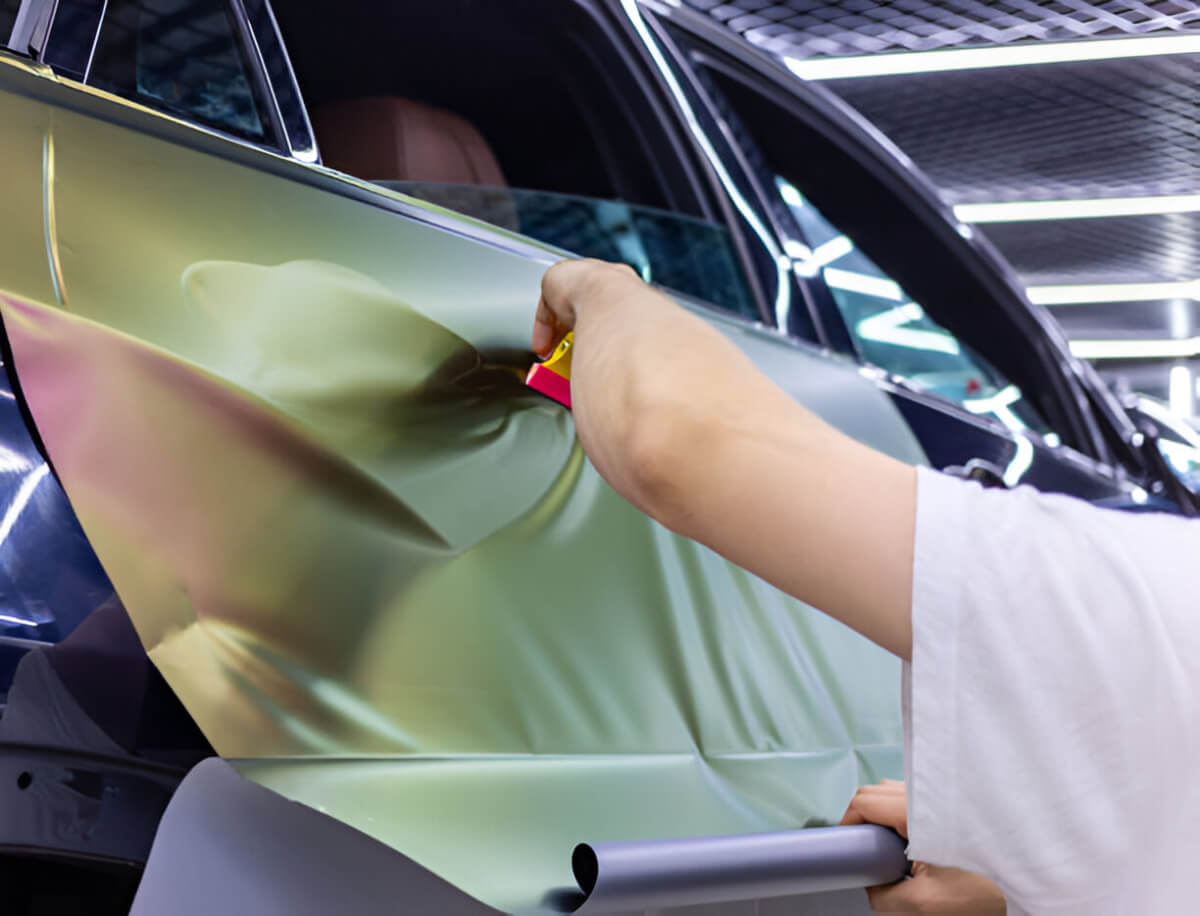
2. Apply the Tint to the Inside
Spray the inside of the window with your soapy solution. Carefully peel off the film liner to expose the adhesive. Align the tint with the bottom of the window and work your way up.
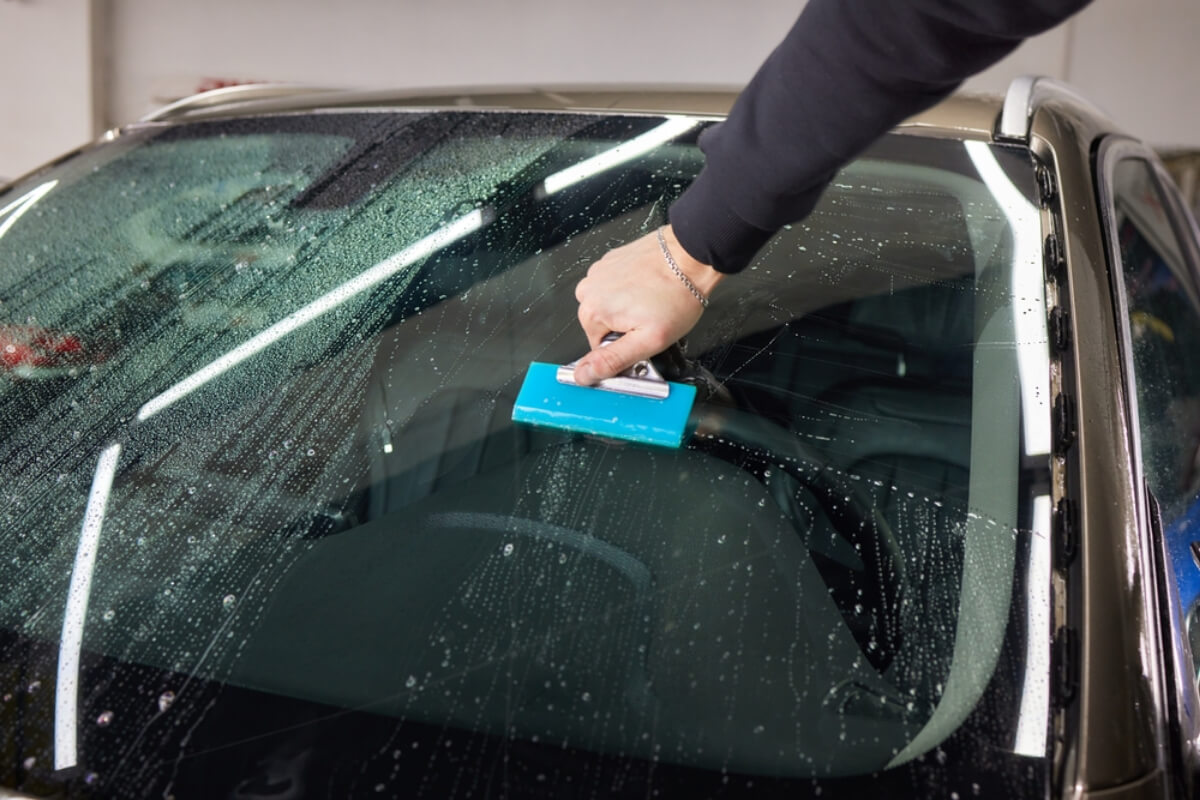
3. Remove Bubbles and Smooth It Out
Use your squeegee or credit card wrapped in a soft cloth to smooth out the tint. Start from the center and push air bubbles outward. Apply more solutions as needed to help reposition and reduce friction.
4. Final Touches
Trim off any excess film around the edges using a utility knife. Run your squeegee along the borders again to secure the edges. Let the tint cure for a few days before rolling the windows down.
Common Mistakes to Avoid
DIY tinting is definitely doable—but only if you avoid these rookie errors:
- Skipping the cleaning process: Dirt or grease will trap bubbles under the film.
- Working in a dusty environment: Dust can get between the film and glass.
- Cutting film too small: Always leave a slight margin for trimming.
- Not using enough soapy water: This makes it harder to position the tint.
- Rushing the process: Patience is key to a clean, professional-looking finish.
Not Feeling Confident? Try Car Window Tinting in Mississauga
If you’re in the Mississauga area and aren’t quite ready to go the DIY route, no worries—there are plenty of local professionals who can get the job done right.
At Dreams Canada Wraps, we specialize in premium window tinting services using top-of-the-line films. Our experienced technicians ensure a perfect fit, clean finish, and compliance with local laws. Whether you’re after privacy, protection, or style, we’ll help you choose the right type of film—ceramic, dyed, or metalized—based on your budget and needs.
Final Thoughts
Tinting your car windows doesn’t have to be intimidating. With the right tools, some time, and a methodical approach, anyone can learn how to tint car windows like a pro. It’s a great way to enhance your vehicle’s look while adding real value in terms of comfort and safety.
Still unsure if DIY is the way to go? Let Dreams Canada Wraps handle it for you. From expert tinting and professional-grade films to custom car wraps and detailing, we’ve got you covered.
Contact us today or search “car window tinting Mississauga” to book your appointment and elevate your ride!